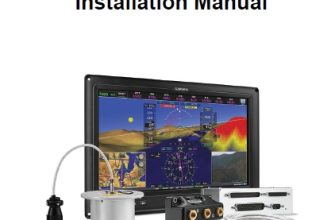
This manual is intended to provide mechanical and electrical information for use in the planning and design of an installation of the GMA 342/345 into an aircraft. This manual is not a substitute for an approved airframe-specific maintenance manual, installation design drawing, or complete installation data package. Attempting to install equipment by reference to this manual alone and without first planning or
designing an installation specific to your aircraft may compromise your safety and is not recommended.
The content of this manual assumes use by competent and qualified avionics engineering personnel and/or avionics installation specialists using standard aviation maintenance practices in accordance with Title 14 of the Code of Federal Regulations and other relevant accepted practices. This manual is not intended for
use by individuals who do not possess the competencies and abilities set forth above.
The GMA 342 and GMA 345 are audio panels manufactured by Garmin, commonly used in general aviation aircraft. These audio panels provide a central interface for managing communication and audio functions in the cockpit. Here are general steps for the installation of the GMA 342/345 audio panel:
- Preparation and Documentation:
- Review the installation manual provided by Garmin for the specific model you are installing (GMA 342 or GMA 345).
- Ensure that you have all the required installation kits and hardware.
- Cockpit Assessment:
- Assess your aircraft’s cockpit to determine the appropriate location for the GMA 342/345. Common locations include the instrument panel or overhead console.
- Safety Precautions:
- Ensure all electrical power to the aircraft is turned off.
- Observe safety precautions, including proper grounding and personal protective equipment (PPE) as needed.
- Remove Old Equipment (if applicable):
- If you are replacing an existing audio panel, carefully remove the old panel and disconnect all associated wiring.
- Mount the GMA 342/345:
- Mount the GMA 342/345 audio panel securely in the chosen location using the provided mounting hardware.
- Wiring:
- Connect the necessary wires according to the installation manual and diagrams. This typically involves connections for power, audio inputs and outputs, microphone jacks, and speaker outputs.
- Pay close attention to proper wire routing and labeling to ensure a neat and organized installation.
- Antenna Connections:
- If the GMA 342/345 includes built-in intercom and Bluetooth capabilities, connect any necessary antennas.
- Test and Verify:
- Before closing up the installation, turn on the aircraft’s electrical power and test the audio panel to ensure it is functioning correctly.
- Check all communication and audio functions, including intercom, radio transmission, and audio routing.
- Final Installation:
- Once you have verified that the GMA 342/345 is working correctly, secure all wiring, panels, and covers.
- Double-check that all connections are properly torqued and secured.
- Documentation and Certification:
- Document the installation process, including wiring diagrams and any deviations from the installation manual.
- If required, obtain any necessary certification or approvals from aviation authorities.
- Testing and Calibration:
- After the installation is complete, perform a thorough system test and calibration to ensure that all audio and communication functions are working as intended.
- Training and Familiarization:
- Ensure that pilots and crew members are familiar with the operation of the GMA 342/345 audio panel.
It’s essential to follow the specific installation instructions provided in the Garmin installation manual for your model, as there may be variations depending on the aircraft type and configuration. Additionally, it’s recommended to have the installation carried out by a certified aviation technician or avionics shop to ensure compliance with safety and regulatory standards.


